I know it's been a while, I'm hoping to post a little more often to force my scatter brained self how to re-create some of the delicious foods that I make!
This recipe has quickly become a favorite in our house and is sweetener free too!! It's a great recipe if you're craving something sweet or just want to get a great start to your morning! I try to have steel cut oats once a day and this one is my new go to recipe. I'm not posting a picture because it rarely lasts long enough for me to take one! Next batch I'll update this post with one though!
Carrot Cake Oatmeal
2 cups almond milk
2 cups water
2 cups steel cut oats
1-2 cups grated** carrots (more if you really love carrots less if you've got pickier eaters!)
1 can crushed pineapple in juice (make sure it's the no added junk you can't pronounce kind)
1/4 cup golden raisins reconstituted in boiling water*
1 tsp cinnamon
1/4 tsp ginger
Dash freshly grated nutmeg
1 tsp vanilla
1/2 tsp lemon juice
Walnuts (Optional for garnish)
Shredded Coconut (Optional for garnish)
*I do not like raisins, I do however love them when they're reconstituted and plum up 3x their size. If you like your raisins wrinkly, do not reconstitute them and add them as a garnish at the end.
**I do not like the bagged shredded carrot at all for this, it's far too dried out. I'd strongly recommend grating your own to make sure you're capturing all the delicious carrot juice!
Toss the almond milk, water, oats and raisins in a pan on the stove and bring to a boil then lower to a simmer. I've found different brands of oats take different amounts of cooking time so keep your eye on it and keep stirring. After about 10 minutes add the rest of the ingredients except for the walnuts and coconut. Keep stirring until your oats are done and it's the thickness you like (you can always add a splash more almond milk if you like!) Garnish with walnuts, shredded coconut, pineapple or anything else that sounds good to you!
For special occasions, we make a "frosting" for the oatmeal. It contains vegan cream cheese which is a little too processed for me to eat often but it works really really well in this frosting/drizzle. I've never really measured it, but I'd say it's about 1 tbs vegan cream cheese, 1-2 tbs almond milk and 1/2 tbs maple syrup. I usually microwave it for 10 seconds to soften the cheese and then whisk until combined!
I hope you remember this recipe the next time you're craving carrot cake and try this instead.
Who says you can't have cake for dinner :-).
Monday, January 14, 2013
Wednesday, April 20, 2011
Best Vegan Mac and Cheese!!
Let me start by saying I love vegan cheese cough*Daiya*coughcough as much as the next gal, but I am working on eating healthier and a bunch of solidified oil isn't always the best way to do that. I got to thinking of other ingredients that could give the same richness and creamyness that dairy lends to mac and cheese, and I started thinking about one of my favorite foods of all time - Kabocha Risotto. If you haven't tried this yet WHAT THE HELL ARE YOU WAITING FOR?!?!?! In reality risotto works wonderfully with just about any squash you can get your hands on (well maybe not spaghetti but that's a different post all together!). The reason why Kabocha works so well is that when it is cooked it gets this dreamily creamy consistency. It's the same reason that it's one of my favorite soup ingredients. This breakdown happens with all squashes but I think it just happens faster with Kabocha making it oh-so easy and delicious! For those of you who are thinking "I have never heard of Kabocha squash in my life" it's also referred to as buttercup squash (I don't believe there's a definite difference between the two).

Today I added a few drops of toasted sesame oil to this and let me tell you the flavor from those few drops of oil carried through the entire sauce! If you're looking for something to pack a ton of sesame flavor without a lot of oil give this a shot!
Anyways the result? HUGE SUCCESS!! However I don't plan on stopping here with Kabocha, as my brain is reeling with all the various uses for it - creamy salad dressings, oil-free hummus, reduced fat guacamole, the possibilities are endless! And using it can replace a good chunk of fat with a naturally healthy vegetable, meaning why not give it a shot!
In case you need any further proof that it is in fact as amazing as I am claiming it to be, here's a picture.
Ahhhh I have your attention now don't I? :-)
So I made this sauce yesterday and just tweaked it a bunch today and threw it on some brown rice pasta. I don't remember all the specifics but I suspect if you're reading this you're up to experimenting with it and playing around with the ingredients! A quick confession though - I did use about a Tbs of Earth Balance in this recipe although I don't think it was in any way shape or form necessary. Unfortunately it was one of the first ingredients I put in there and I don't think it added very much to the end product. If you'd like to add it I'd suggest adding it last so you can see if/how much you need!
Kabocha Cheeze Sauce
1 Kabocha Squash (roasted in 400 F oven until flesh was soft)
1.5 Tbs Tahini
1.5 Tbs White Miso
1 tsp Adobo Sauce (from the little cans of Chipolte Peppers in Adobo Sauce... save the chili's for later and just use the super flavorful sauce for this!)
1/4 cup Nutritional Yeast
1.5 tsp Garlic Powder (one clove of the good stuff if you have it on hand... we were out :-( ).
Dot of Earth Balance as needed (less than 1 Tbs)
Water to desired consistancey
Place roasted squash flesh into a food processor and pulse a few times. Add about 1/4 cup water to get things processing better. Here's the point where you start trying it to see how thick you want it. Cheese sauce? You'll probably need at least another 1/2 cup. Dip or spread? Start with another 1/4 cup and go from there. This part is really up to you, add slowly though as it'll be a pain if you get it too thin (ie you'll probably have to reduce it on the stove a bit or something). Add in the rest of the ingredients and process until silky smooth. Add any additional flavorings you'd like and enjoy!
A few notes:
Today I added a few drops of toasted sesame oil to this and let me tell you the flavor from those few drops of oil carried through the entire sauce! If you're looking for something to pack a ton of sesame flavor without a lot of oil give this a shot!
I REALLY REALLY REALLY liked adding sunflower seeds to mine today! This worked especially good with the pasta but I also added some to the rest of the sauce and enjoyed with carrots. The nuttiness works really well with the flavors. You could probably just add in a dot more tahini but I love the added crunch.
I also threw in way more adobo sauce today when I had it with veggies as I wanted it to have a little more of a kick!
Long story short - if you're looking to healthy alternatives to higher fat cheese alternatives give squash a try! You might end up as hooked as I am!
Monday, April 4, 2011
Quick Update!
As of today, I have been raw two weeks! The time is flying by and I honestly didn't expect it to be this easy! The only tough parts have been really long days where I can't really pack a lunch or head back to my apartment... not fun at all. But other than that I think I'm doing pretty good! I'm sleeping better (when school work isn't killing me), have more energy and my focus is getting a lot better!
I've also slightly changed the parameters of this raw experiment since I last posted. I am working on sticking to raw more so than I expected to. Why you may ask? It's so much faster and simpler! I spend far less time in the kitchen and end up more satisfied and eating really good food. I do have several pretty hard restrictions though, I'm not consuming sugar, wheat, alcohol or caffeine until I am done with school (May 3). I don't miss these things too much but there are days where I'd seriously kill for a muffin and coffee! Like I said before though, this raw lifestyle is an experiment, where I try to find the combination of foods that makes me feel my best, so hopefully I'll see a permanent change by the end of it and will be able to make a decision on how I want to proceed.
My mom visited yesterday and we had an AMAZING lunch with a very quick and simple salad - spinach, strawberries, walnuts and homemade balsamic vinaigrette! In total it took about 5 minutes to throw together and was incredible. I did hit up Whole Foods for dinner on Saturday though and had a pretty decent meal there too. I had a little tofu (cause it was a special occasion) and some really tasty southwest style mix between salsa and a salad. I also had the kale and tahini salad... which was straight out awful. I don't even know how but it was just terrible. Also at Whole Foods I also found KeVita, which was a genius buy. Not even taking into account that it has a ton of awesome probiotics, no sugar or other weird stuff, it's a REALLY REALLY tasty drink for 30 calories a bottle. I had the mango coconut and you can rest assured that the next time I see it I will be picking up more than one bottle! Their website is here http://kevita.com/ but as far as I can tell they're mainly just located in Whole Foods at the moment... hopefully they'll get distributed elsewhere soon as I'm pretty sure I live in the largest city on the eastern coast that doesn't have a Whole Foods less than 45 minutes away!
Anyways sorry for the rambling post! After two weeks raw, I can say this much, if you've been interested in it or kind of considered going raw in the past, GIVE IT A SHOT! No more waiting for tomorrow or for it to get easier, I swear if I can do it than anyone can!! <3
Wednesday, March 23, 2011
Going RAW!
So a few big changes around here, the number one being that I am focusing on going raw!! It's something I've always been fascinated with and am hoping it gives me a little extra energy to get through my last leg of college! I've been reading Crazy Sexy Diet by Kris Carr who funnily enough was the one who inspired me to make the switch from vegetarian to vegan. I'd strongly recommend the book as it's not only informative but supportive, not to mention a fun read!!
First, Logistics. I am not going 100% raw. I will still use both beans and whole grains (mainly quinoa). This makes my life a WHOLE lot easier and I strongly believe that both of those food groups are awesome for you. I'm mainly focusing on cutting out any and all processed foods, especially sugar and wheat and adding in lots more fresh fruits and veggies. Lately I've been in a kind of mental fog and I'm hoping cutting out the sugar will help eliminate that. I am also drinking store-bought green juice. If I were to get a juicer, I'd be looking for one that was able to handle leafy greens and I am pretty sure all those in my price range can't. I know it's not the best solution but I'm choosing only juices that are 100% juice (or puree) and contain no added sugar of any kind. My favorite of all time is Odwalla's superfood juice which I can't get enough of. It's really expensive around here though, so I've mainly been getting the Bolthouse green drink (I forget the name).
Second - What Have I Been Eating?
Well, this is only the third day of my raw excursion. I've been focusing on lots of raw greens, nuts and fruits. For example, today I've had a glass of juice and a grapefruit for breakfast, a cucumber with hummus for a snack, and an OMG SO GOOD IT WILL KNOCK YOUR SOCKS OFF massaged kale salad.
Confession: Kale is quite possibly my favorite food, but eating it raw always scared the shit out of me! I honestly don't know what I was scared off as it was way faster to make and really amazing!
Anyways it's only been three days but I am definitely feeling pretty good. It may be the diet and it may be spring poking its head out every now and then, but you won't find me complaining!
Oh another note about going to raw foods, if you're looking for a diet, there is NO hunger and NO guilt! Even with raw desserts, I've found them to be significantly more filling than processed or cooked ones and they're chock-ful of great nutrients too!
Sorry for the super rambling post! I'm also spastic and couldn't wait to eat the salad so there isn't a picture of it :-( I'm sure I'll be making lots of it in the future though so you'll probably see one soon. Just take my word for it - it's really pretty!
Raw Kale Salad
2 cups raw kale - cut to your desired preference (I am a wimp so mine was really really small)
1/2 lemon
1 smallish avocado (mine had a bad spot so it was probably more like 3/4)
1 scallion
1 handful sprouts
Pinch of pink sea salt
Garlic powder
Tinyest splash of olive oil
To start I put the chopped kale in a bowl and then added the juice of 1/2 a lemon. Then I got to work! I massaged it for probably five minutes, but go for as long or as short as you'd like. Then I added the avocado and massaged that in fairly well. Add everything else and you're good to go!
This makes a good size salad for one person and left me feeling completely full and satisfied!
Thursday, February 24, 2011
Best Popcorn Recipe EVER
First of it's been forever since I blogged. Life's been getting in the way and school (my last year of college!!!) is seriously kicking my ass.
Now... I have an amazing recipe most of you have probably already made in some way shape or form... what can I say? I'm slow and stubborn sometimes.
For those of you who for some reason have not tried making popcorn on the stove here are some pretty great reasons you should try it:
- IT"S CHEAP!! Even if you buy organic kernels it only takes a tablespoon or two to make the equivalent of that microwavable crap.
- It's harder to burn! It would seem like it would be way easier to burn popcorn on the stove but trust me, I have burned far too many bags either due to terrible microwaves or being a space case.
- There are fewer unpopped kernels. I'm sure this is how it's supposed to work in the bags too but it actually works on the stove. All the kernels fall to the bottom of the pan as you shake the pan while it's cooking.
- You can control the flavor! Want super buttery vegan popcorn and don't trust the "natural flavors" of bagged kind, you can Earth Balance til your heart's content. My recipe here is for nacho-cheezey popcorn that I used as an excuse to get some extra B-12 into my diet :-)
- It's healthier. You control the ingredients... no more congealed salt and oil coating your popcorn. Instead use olive oil or Earth Balance and spice it up!
- It's faster to make large quantities. I make homemade popcorn all the time for friends cause it's stupidly cheap, fast, delicious and is generally something everyone will like.
Yeah I don't really have any downsides except maybe the fact that I tried to make kettle corn and it's an experience I don't want to talk about.... I will say this much though, if you give it a chance wear protective gear. REALLY. You need to stir it constantly and the popcorn will go flying with molten sugar... it's not fun and you'll probably get burned. That may have just been me failing miserably or following a bad recipe, but I'm not going to try it again.
Ok now to the part you're all waiting for - RECIPE!!
The first part is more of a method for cooking it while the second is a recipe.
POPCORN ON THE STOVE
Ingredients
Canola Oil
Popcorn
Toppings (see below)
Before getting started be sure to have a pot that has a lid that fits (this is my biggest problem!)
Start pan heating up on medium-high heat, and add enough canola oil to very lightly coat the bottom of the pan (add less than you think you need and try swirling it around - when the pan's hot you should be able to use less than you thing).
Add in enough popcorn to create a SINGLE layer of kernels on the bottom of the pan. Note: if you have a pan with a ginormous diameter and is fairly short - don't add as many kernels (you'll be dealing with overflow in a few minutes if you do).
Cover the pan and shake to coat all the kernels in oil and let it do it's thing! I usually shake the pan every now and then.
Wait til the popping slows down and empty contents out into a serving bowl (do this fairly quickly as it will burn if you leave it in the pan for too long).
Add toppings and ENJOY!!!! :-D
NACHO CHEEZEY TOPPING
This couldn't be simpler.
I melt about 1.5 tbs of Earth Balance in the micro (use more or less depending on how you like it) and then add about 2tsp paprika, a tsp garlic powder and a good dash of salt to the butter and stir well. Dump this mixture on the popcorn and stir to incorporate. Throw on a heaving tablespoon of nutritional yeast and once again mix to incorporate.
For other flavors simply change up what you mix in with the Earth Balance. This parsley garlic salt that my friends have ALWAYS goes over well, but curry or garam masala or chili powder would all be incredible too. The options are endless!
Hope you guys give stovetop popcorn a chance!!!
Thursday, November 11, 2010
Homemade Sriacha - Vegan MOFO Days 9 and 10
I know I know I didn't post last night... but I couldn't help it our internet is really finicky and I can't post from my phone! When I tried to write from the school's computers it wasn't letting me input pictures either :-(. Anyways here it is a little late!

For those of you who don't know what Sriacha or Rooster Sauce is, it's essentially a chile and garlic sauce. I'm not one for super spicy foods so I usually don't add too much of the stuff, however this homemade stuff is fantastic! My friends and I followed this recipe and it was really simple and turned out great! If you're a fan of the bottled stuff or like spicy things in general I'd strongly suggest this stuff!
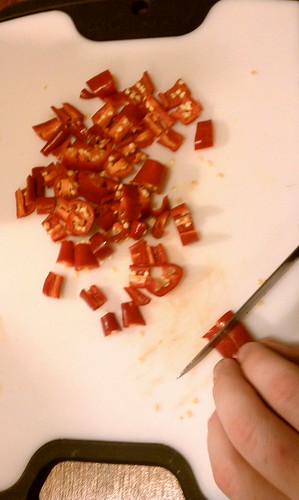
It all starts with fresh chiles:
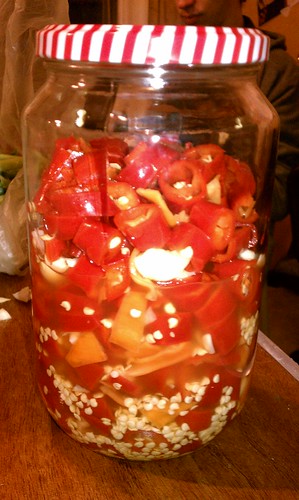
Then they meld with the vinegar overnight:
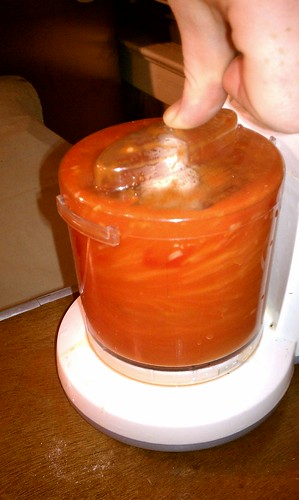
Then get cooked a little:
AWESOME ACTION SHOT!!!
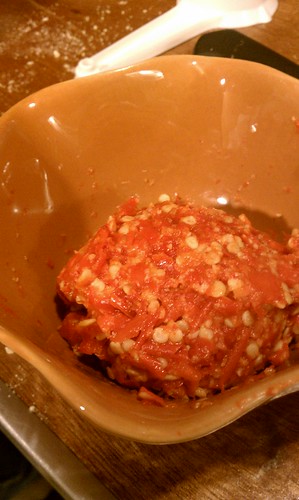
After it's processed it's strained really well. We processed the pulp again to make sure all the juices got into the Sriacha, here's the leftover pulp.
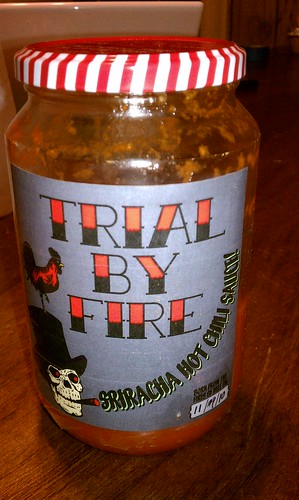
AND IT'S DONE!! And delicious too I might add. The color is AMAZING although you can't really tell from the pictures.
One of my friends made a thoroughly kick ass label for it... I think we may use this for future condiment making adventures as well!
(I don't know if you can read it but this Sriacha was born from the fires of hell just yesterday! :-) ).
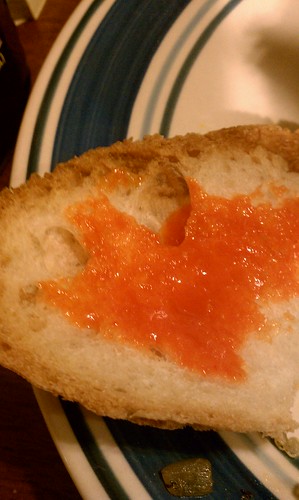
In other not-as-exciting food news, I've been cooking up some fairly simple but still tasty food the past few days.
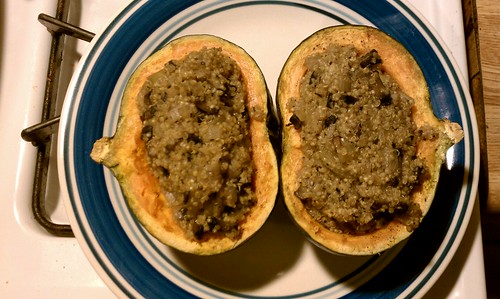
Tuesday was a stuffed squash kind of day.
Simply an acorn squash roasted stuffed with portabellos, onions and quinoa.
Today was an even-less exciting bowl of quinoa topped with the makings of Fat Free Vegan's Kochu Chang Substitute. This recipe is what got me addicted to miso and is amazingly tasty on a plain old bowl of quinoa. I took a picture but as it turns out a dollup of red miso on a pile of rice doesn't look too appetizing so I left it out! :-)
Anyways... Long story short - everyone should learn how to make their own condiments!! More are coming soon!
Tuesday, November 9, 2010
Lunch, Dinner and HOMEMADE SRIACHA!!! Vegan MOFO Day 8
Well it's officially been over a week of Vegan MOFO and I'm still going strong!! Ok cooking-wise today was a little boring and I apologize! Even after going home for a mere 24 hours, my schedule's all out of whack... that might be daylight savings time too, who knows. All I know is that I miss my kitchen terribly (as well as my mom and puppy but let's be real you're all here to hear about the FOOD!).
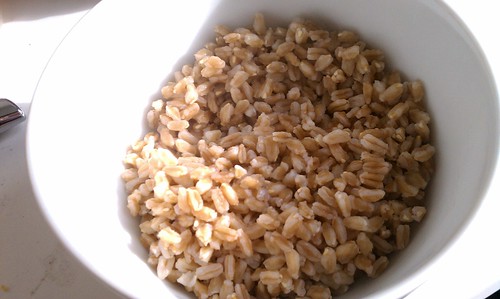
Anyways today's lunch started out with a new product from my hometown grocery store!! Well when I say "new" I mean it's really an ancient grain that's recently been re-discovered.
Behold Farro!
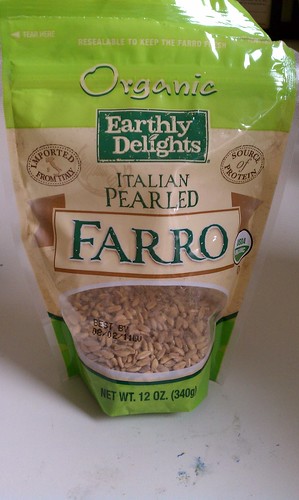
I'm not sure if you've had the chance to try this delightful grain, but it's amazing. While the instructions were a downright lie (1 part grain to 3 parts water!!!) it cooked in about 15 minutes to the perfect level of doneness. It has a great texture, like al-dente pasta with a slightly nutty flavor (think sunflower seeds type of nutty). It's also chock-full of protein!
I needed something to go with my delicious farro so I cooked up some spiced squash and onions. I basically just sauted half an onion along with half an acorn squash and a ton of paprika and cumin!
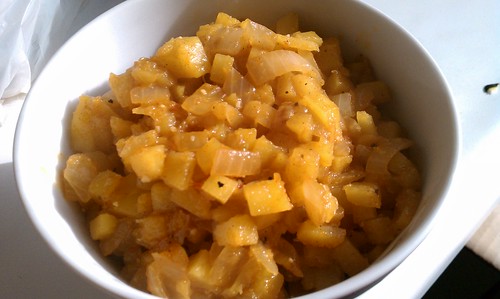
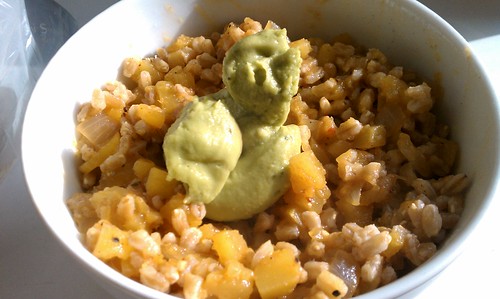
While it was good it was missing a little something... zing you may say. After trying to figure out what could make this even more tasty, I discovered the guac I had sitting in the fridge... PERFECTION!
After lunch I met my fabulous little cousin (who's essentially my baby sister) for delicious coffee and I had this soy-"White Hot Love" specialty drink which had mocha, carmel, and hazelnut flavored deliciousness! I forgot to take a picture before I dug in... I'll have to post more when it's the barista who makes foam jack-o-lanterns!! This one isn't as exciting.

For dinner I wanted something quick so I threw together some garlic, oyster mushrooms and kale drizzled it with sesame oil and added some paprika and miso.

It doesn't look like much but man did this hit the spot!
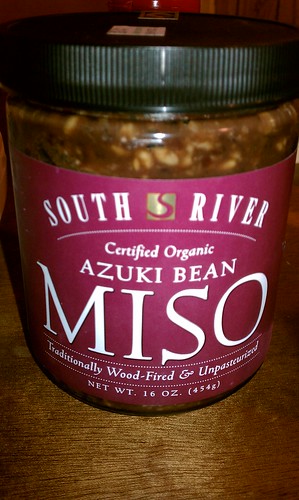
On the subject of miso, I found this great brand that's local for me and has all sorts of really interesting types of miso. My favorite, South River Miso's Adzuki Bean Miso, just so happens to be soy-free and chock full of beans and grains! It's not a smooth miso so I'm not sure how it would do in a soup form, but if you see this stuff on the shelves give it a try!
Now for the part of this post I'm sure you're all looking for... Homemade Sriacha!
We're following this recipe, and I'll let you know how it goes tomorrow! The chiles need to sleep overnight before we can go on, but it smells delicious right now! I'm not big on spicy foods but this is pretty exciting.
Chopping the main chiles... I don't remember what they're called but they're the long skinny red ones.
We also added a few habeneros for an added kick!
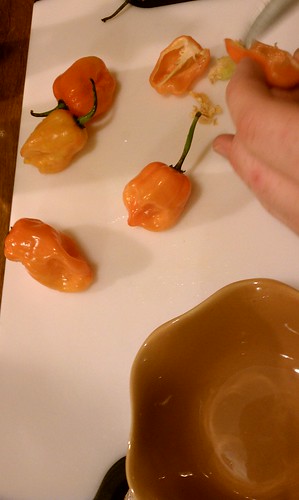
Shhh the peppers are sleeping until tomorrow! :-D
Anyways today's lunch started out with a new product from my hometown grocery store!! Well when I say "new" I mean it's really an ancient grain that's recently been re-discovered.
Behold Farro!
I'm not sure if you've had the chance to try this delightful grain, but it's amazing. While the instructions were a downright lie (1 part grain to 3 parts water!!!) it cooked in about 15 minutes to the perfect level of doneness. It has a great texture, like al-dente pasta with a slightly nutty flavor (think sunflower seeds type of nutty). It's also chock-full of protein!
I needed something to go with my delicious farro so I cooked up some spiced squash and onions. I basically just sauted half an onion along with half an acorn squash and a ton of paprika and cumin!
While it was good it was missing a little something... zing you may say. After trying to figure out what could make this even more tasty, I discovered the guac I had sitting in the fridge... PERFECTION!
After lunch I met my fabulous little cousin (who's essentially my baby sister) for delicious coffee and I had this soy-"White Hot Love" specialty drink which had mocha, carmel, and hazelnut flavored deliciousness! I forgot to take a picture before I dug in... I'll have to post more when it's the barista who makes foam jack-o-lanterns!! This one isn't as exciting.
For dinner I wanted something quick so I threw together some garlic, oyster mushrooms and kale drizzled it with sesame oil and added some paprika and miso.
It doesn't look like much but man did this hit the spot!
On the subject of miso, I found this great brand that's local for me and has all sorts of really interesting types of miso. My favorite, South River Miso's Adzuki Bean Miso, just so happens to be soy-free and chock full of beans and grains! It's not a smooth miso so I'm not sure how it would do in a soup form, but if you see this stuff on the shelves give it a try!
Now for the part of this post I'm sure you're all looking for... Homemade Sriacha!
We're following this recipe, and I'll let you know how it goes tomorrow! The chiles need to sleep overnight before we can go on, but it smells delicious right now! I'm not big on spicy foods but this is pretty exciting.
Chopping the main chiles... I don't remember what they're called but they're the long skinny red ones.
We also added a few habeneros for an added kick!
Shhh the peppers are sleeping until tomorrow! :-D
Sunday, November 7, 2010
Best Kitchen "Gadget" EVER - Vegan MOFO Day 7
I need to clear the air... if there is a useless kitchen gadget or some ridiculous product that can only complete one task I will probably decide that I have a need for it. However, about five years ago my mom got a gift certificate from William Sonoma. We don't have a lot of fancy kitchen stuff so it was kind of a big deal for us. So much of a big deal that we couldn't figure out what to buy, and there aren't any Sonoma stores near us and we'd always forget the certificate anytime we were near one. Cut to FIVE years later when I saw a friend's ridiculous looking pan and realized that it could be purchased for the exact amount of our gift certificate. Also, William Sonoma was AWESOME about honoring such an old gift certificate, I know there are certain laws requiring companies to be better, but five years is a pretty long time and they didn't give us any trouble whatsoever!


I assumed it was for some method of cooking eggs, but eventually found out that it was an Ebelskiver Pan. Ebelskivers are essentially filled pancakes and might seem complicated but are actually REALLY easy to make! I even use the pan for non-stuffed muffins, which are amazing because the edge of the Ebelskiver gets super crispy while the inside is light and fluffy! A how-to video can be found here if you're curious!
Ebelskivers are also decadent while having the same nutritional value as pancakes, and for me they're way healthier because I don't add butter or syrup to them!
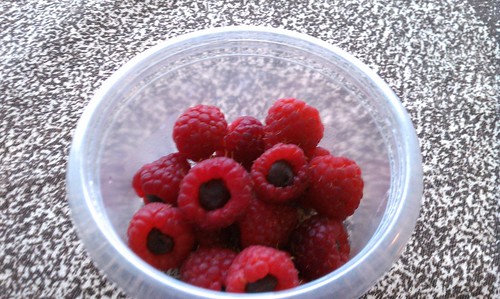
My favorite way to make Ebelskivers is to just use the Perfect Pancake recipe from Vegan Brunch, but you can use your favorite pancake recipe, it's pretty flexible. This morning we stuffed our Ebelskivers with raspberries and chocolate chips!
To make things easier I stuff a chocolate chip into each raspberry!
Cooking Ebelskivers look like UFOs!
For some reason they look eerily like eggs, but I assure you they're not!
OM NOM NOM!
Disclaimer - I was not paid to do an endorsement, just love the product!
Vegan MOFO Day 6 - Sweet Potato Stew, Chocolate Cake and VEGAN MARSHMALLOW FLUFF!!!
First off I know what you're thinking... "You ACCIDENTALLY made vegan fluff??" The answer is a resounding YES! More to come on that later... but here's a teaser pic!

It was super easy, cheap and doesn't have a ton of crap or chemicals!

I made this stew a few weeks ago for friends and we scarfed it down, so I figured a re-make would be fabulous. I started off with this recipe and changed enough that I'll post my version! If you have the chance to get cumin seeds I can't recommend doing it enough. It may seem pricey or like it would be a pain in the butt, but it's completely worth it! And you use less because it's more potent (not to mention has better flavor) so you save money in the long run!
Butternut Squash and Sweet Potato Stew
Ingredients
1 large butternut squash - chopped
1 or 2 largeish sweet potatoes - chopped
2 large onions - chopped
1 head of garlic - roughly chopped
2 cans of black beans - drained and rinsed
veggie stock (for the bazillionth time this week use Better than Bouillon it gives you way more control over how much stock you use!)
2 tbs cumin
1 tsp paprika
1 tsp chili powder
juice of half a lime
Saute squash, sweet potato and onions until soft. Add enough veggie broth to cover (monitor as you go to ensure your desired stew consistency). Throw in garlic and spices. Simmer until squash breaks down. Serve with a touch of vegan butter on the top and some fresh herbs or scallions!
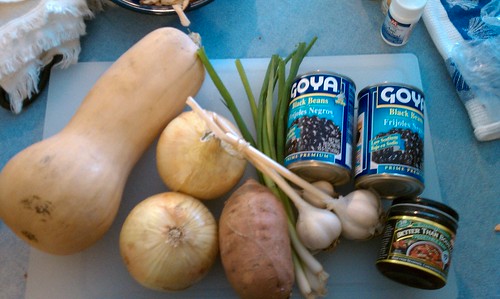
The makings of an amazing soup!!
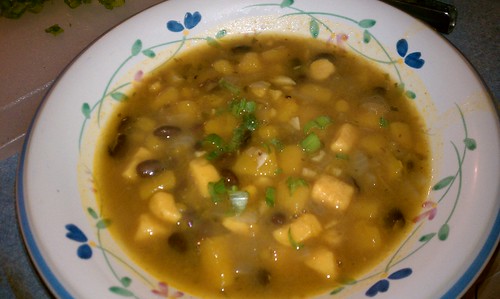
The finished product!
Now the part I'm sure all of you are wondering... how did she make vegan fluff in 5 minutes??? Remember how yesterday I mentioned the glorious coconut creme I found in the fridge? I thought it would make a perfect frosting for a cake... oh man was I WRONG. First I was using a different brand of coconut milk so I'm not sure if that made a difference or not, but the creme wasn't as firm or whipped like this time... I may have needed to refrigerate it for longer too, who knows? Anyways I thought it would be fine if I just added some powdered sugar to it.... yeah DID NOT WORK! Proof of fail is pictured below!
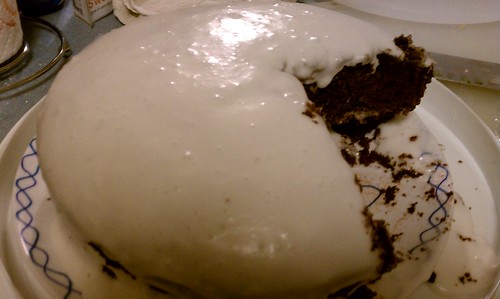
You can't see from this picture but the cake's top layer has basically slid off the bottom layer! Whoopsies :-). While I was making the "frosting" I started thinking that it seemed an awful lot like marshmallow fluff! Taste, texture, EVERYTHING! It even got the same level of gooey as fluff does, but dries with a non-sticky surface (keeps the gooeyness though!!!)
Stupid Simple Marshmallow Fluff
1 can full fat coconut milk, chilled and only the fluffy creme part of the milk, not the watery part
3-4 cups powdered sugar
Whisk together!
Serve in a pb&fluff sandwich, or however you'd use the original stuff!! More recipes with this stuff are sure to follow!
Friday, November 5, 2010
Another Soup Kind of Day - Vegan MOFO Day 5!!
So I had a quick post this morning as I had to get up about 3 or 4 hours earlier than normal and figured a delicious breakfast would be a great way to start the day. The awesome food stuffs continued throughout the day as I finished yesterday's "Pick Me Up Soup" which was just as awesome day two as it was day one and desperately needed as a quick lunch!
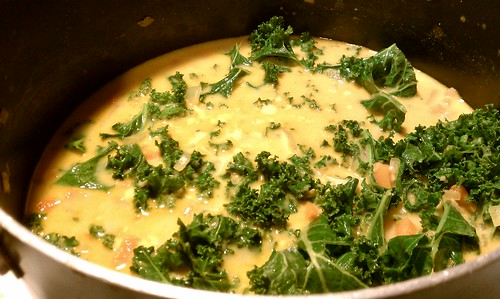
Tonight I decided that the weather is still pretty sucky so I kept up with the soup theme and used a bunch of veggies I had lying around. The result? AH-MAZ-ING!!!! I also learned first hand how to make coconut whipped cream accidentally. Yes it is that easy as I had thrown some left over coconut milk in the fridge only to find a supremely light whipped coconut creme when I opened the container. Give it a try and you won't be disappointed!
Soup Cooking!! Isn't it a beautiful soup??
Here's the recipe of the day, once again use whatever you've got on hand, sub squash for sweet potatoes, omit the kale, add greens, whatever you like!
Sweet Potato and Kale Curry Soup
1 large sweet potato roughly diced
1 onion diced
3 cloves of garlic minced
1 inch of ginger grated
veggie broth to your desired consistency (you can use water if you'd like the soup has more than enough flavor to carry itself!)
2-3 tablespoons curry powder (amount depends on strength of powder so start off light and add to your taste)
dash cumin, paprika, lime juice, salt and pepper
about 1 can coconut milk (or as much as you have)
1/2 bunch kale
Saute onion, garlic, ginger, and sweet potato. After a few minutes start adding curry powder. Cook until onion is translucent and sweet potato is soft. Deglaze the pan with water or veggie broth to desired soupy-ness. Season with cumin paprika, lime juice, salt and pepper. Let simmer for about 10-15 minutes, taste and adjust spices if necessary. Add coconut milk and simmer for an additional 5-10 minutes. Add kale and cooked til the kale is wilted to your liking (about 5 minutes).
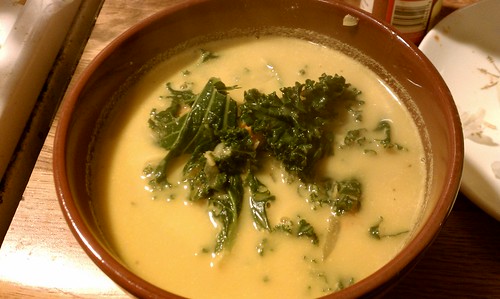
Serve and enjoy!!
And because I find summaries super useful I'm going to try to keep it going!
To summarize:
Cost: About $4 using pantry staples
Servings: 3 large servings
Special Ingredients: Coconut Milk (I'm not counting curry powder again as it's a spice and if you don't have any, it's well worth the $2 or $3 to get some!)
Rating: Another 10/10!
Subscribe to:
Posts (Atom)